
Solo camping for beginners should start with a simple goal: choose a trip that is easy to plan, easy to find, and easy to leave if conditions change. A first solo trip is not the time to prove independence in a remote place. It is the time to build a repeatable safety routine.
This checklist is written for US campers planning a first solo campground, walk-in, or low-complexity frontcountry trip. It is research-only, includes no affiliate links, and does not claim that Trail Gear Review tested a campsite, method, or product.
The Short Answer: Start Small and Make the Trip Easy to Reverse
Solo camping can be a reasonable first independent camping goal when the trip is modest, the campsite is legal and easy to identify, the weather is acceptable, and someone at home knows exactly when to act if you do not check in. It is not automatically safe just because the gear list is complete.
The safest beginner mindset is conservative. Choose a destination close enough to leave, familiar enough to navigate, and developed enough that you are not solving every problem alone. The National Park Service camping trip-planning guidance advises campers to match a trip to their limits and experience level, and that advice matters more when you are the only person making decisions at camp.
Use this article as a planning checklist, then verify current rules, closures, weather, water, fire restrictions, and campground details with the land manager or campground before you go.
Step 1: Decide Whether This Is the Right First Solo Trip
Before picking gear, decide whether the trip itself fits your current skill level. For a first solo camp, the best choice is usually a familiar campground or road-accessible site with clear rules, known water or a simple water plan, predictable parking, and a short drive home.
Good first solo camping conditions usually look like this:
- One or two nights, not a long remote trip.
- A reservable or clearly legal campsite.
- A route you can explain to someone else.
- Weather that does not require advanced judgment.
- Cell service at least near the route, campground office, or town.
- A clear plan for arriving before dark.
- A backup place to sleep, such as your vehicle or a nearby motel, if the site feels wrong.
The first trip does not need to be impressive. It needs to be manageable. If the plan includes remote roads, complicated permits, severe weather, difficult navigation, wildlife storage rules you do not understand, or a long hike to camp, save that version for after you have solo systems that already work.
If you are still building the basic packing list, start with Trail Gear Review’s weekend camping checklist for beginners and then add the solo-specific checks below.
Step 2: Choose a Lower-Risk First Campsite
For a first solo trip, campsite choice is a safety decision. Pick the site that reduces avoidable uncertainty, not the one that looks most dramatic online.
Prioritize:
- An established campground, reservable campsite, or legal dispersed site you can verify from an official source.
- A site you can reach and leave without relying on difficult roads or a long night hike.
- Level, durable ground where camping is allowed.
- A place away from low streamside ground when flood risk exists.
- Clear access to your vehicle or exit route.
- Known rules for food storage, trash, quiet hours, fire, pets, and checkout.
- Enough distance from hazards such as dead trees, steep edges, unstable shorelines, heavy traffic, or fast water.
The National Weather Service’s outdoor flood guidance advises checking the forecast before outdoor trips and not camping on low ground next to streams when flood risk exists. That is especially relevant for canyon areas, desert washes, river corridors, and stormy weekends.
Responsible campsite choice also includes impact. Leave No Trace’s Seven Principles include planning ahead, camping on durable surfaces, disposing of waste properly, minimizing campfire impacts, respecting wildlife, and being considerate of other visitors. For a deeper low-impact packing and behavior check, use Trail Gear Review’s Leave No Trace camping checklist for beginners.
Step 3: Leave a Trip Plan With a Real Contact
Solo camping requires a better communication plan than just texting when you get there. NPS advises leaving a travel itinerary with an emergency contact who is not on the trip. Its recommended itinerary details include names and contact information, vehicle description, start time and location, route and activities, equipment, expected finish time, and the park emergency phone number.
For a beginner solo trip, write a short trip plan that includes:
- Your campground or site name, address, loop, site number, or coordinates if appropriate.
- Your vehicle make, model, color, and license plate.
- Your planned driving route and backup route.
- Your arrival window and the latest time you expect to check in.
- Your planned activities, such as staying at camp, walking a short trail, or driving to a viewpoint.
- What shelter and key safety gear you have with you.
- The local ranger station, campground host, park office, or emergency number if listed.
- The time your contact should begin calling or escalating if you miss check-in.
Make the plan specific enough that another person could explain it clearly. If your route changes, update your contact before you lose service.
Do not make your phone the only copy. Save the plan offline, write a paper copy, and keep a simple map or route note with you. Trail Gear Review’s offline navigation backup plan explains how to avoid relying on a single phone screen for the whole trip.
Step 4: Check Weather, Rules and Fire Restrictions
The day before departure, and again before you leave, check the practical conditions that can turn a simple campsite into a bad decision.
Check:
- Weather.gov or the relevant National Weather Service forecast for the closest useful location.
- Overnight low, wind, storms, heavy rain, heat, smoke, snow, or flood concerns.
- Road, trail, and campground alerts from the managing agency or campground.
- Permit, parking, gate, check-in, and checkout details.
- Food-storage rules, especially in wildlife areas.
- Water availability and whether the source is potable.
- Fire restrictions, stove rules, and whether campfires are currently allowed.
- Backup routes, nearby towns, and the latest practical time to turn around.
NPS camping guidance tells campers to review permits and regulations, outdoor conditions, food storage, fire regulations, and pet rules before a trip. NPS campfire guidance also says to confirm whether campfires are permitted and follow local rules before having one.
For a first solo trip, treat bad weather as a planning problem, not a courage test. If the forecast introduces flooding, high wind, dangerous heat, major cold, heavy smoke, lightning risk, or road access problems you are not ready to manage, reschedule or choose an easier site.
For app-based planning, Trail Gear Review’s guide to camping apps for planning, weather and offline maps can help you build a small pre-trip app stack. Still keep official forecasts and land-manager alerts at the center of the decision.
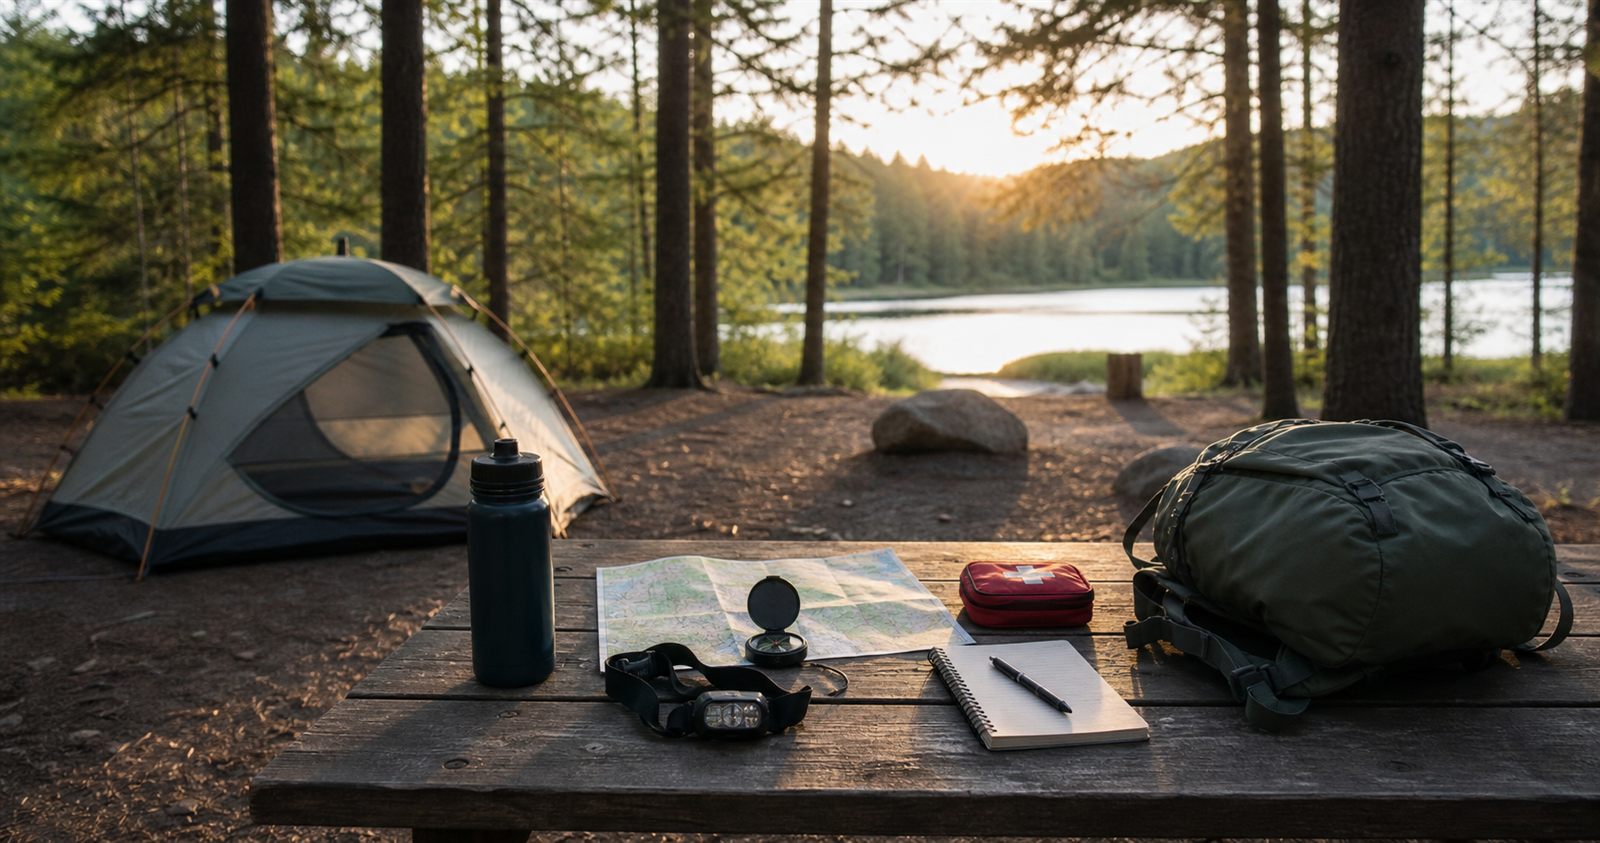
Step 5: Pack Safety Basics Without Overbuilding
Beginner solo camping does not require buying every emergency gadget. It does require covering the basics well enough that one small problem does not become the whole trip.
Use NPS essential categories as a planning frame:
- Navigation: map, downloaded offline maps, route notes, compass or GPS where appropriate.
- Sun and insect protection: sunscreen, hat, sunglasses, insect repellent, and clothing that fits the season.
- Insulation: extra clothing for cold, precipitation, or wind.
- Shelter: tent plus an emergency shelter option appropriate to the trip.
- Illumination: headlamp or flashlight and spare batteries or a charging plan.
- First aid: a kit plus personal medications and any personal medical notes you want accessible.
Water deserves its own decision. NPS camping guidance describes water as an important survival need for drinking, cooking, and cleaning. If treated water is not available, NPS says water should be filtered, treated, or boiled before drinking or food preparation. For a first solo campground trip, the simplest plan is to bring enough water and confirm whether potable water is available on site.
Food is also a safety issue, not just a comfort issue. USDA FSIS outdoor food-safety guidance supports planning meals and equipment ahead, using a cooler or cold source for perishables, separating raw foods, and practicing hand hygiene. If that feels like too much for a first solo trip, simplify the menu instead of improvising at camp.
Keep the kit practical:
- Headlamp within reach, not buried in a bin.
- First aid and medications in one known location.
- Water accessible before you start setting up.
- Rain layer and warm layer easy to grab.
- Car keys, ID, payment card, and phone secured.
- A small notebook or paper plan available if the phone dies.
The goal is not to look expedition-ready. The goal is to know where your essentials are when you are tired, cold, wet, hungry, or unsure.
Step 6: Build a Calm Arrival and Night Routine
Arriving alone can feel different from arriving with a group. Give yourself enough daylight to make slow decisions.
When you arrive:
- Confirm you are at the correct site.
- Park facing the easiest exit if the site allows it.
- Check the ground, overhead branches, water flow paths, and nearby hazards.
- Set up shelter before unpacking comfort items.
- Put water, headlamp, first aid, rain layer, and warm layer in known places.
- Store food, trash, and scented items according to local rules.
- Identify the bathroom, water source, host site, ranger contact, or main exit.
- Send your arrival check-in if service is available.
NPS camping guidance tells campers to check specific food-storage policies and keep food contained and clean so animals do not get into it. Do that early, before it gets dark and before you are distracted by dinner.
For the first night, keep the routine simple. Cook before you are exhausted, clean up before dark if possible, secure food and trash, set the next morning’s basics where you can find them, and keep your headlamp reachable from inside the tent. Avoid testing a complicated new stove, shelter, water treatment method, or navigation setup for the first time after sunset.
Step 7: Set Exit Rules Before You Need Them
An exit plan is not a sign that the trip failed. It is part of the safety plan.
Before leaving home, decide what will make you cancel, leave, or move to the backup plan. Examples:
- Weather upgrades from uncomfortable to unsafe.
- You cannot confirm the site is legal or accessible.
- The road to camp is worse than expected.
- You arrive too late to set up calmly before dark.
- The site feels exposed, unstable, flooded, unsafe, or not as described.
- You cannot store food or trash according to local rules.
- You lose the ability to communicate and the trip depends on check-ins.
- You feel too tired, sick, cold, hot, or anxious to make good decisions.
Write those thresholds before the trip. It is easier to follow a clear rule than to negotiate with yourself at dusk.
If you do leave, tell your emergency contact as soon as possible. A changed plan is fine; an unexplained missed check-in can create unnecessary worry and confusion.
Solo Camping Checklist for Beginners
Use this checklist after you have chosen a specific site and checked current conditions.
Trip Scope
- Choose one or two nights.
- Pick a legal, established, easy-to-find campsite.
- Keep the first trip close enough to leave if needed.
- Plan to arrive well before dark.
- Save a backup lodging or exit option.
Communication
- Leave a written itinerary with someone not on the trip.
- Include vehicle description, route, site details, activities, gear, expected return time, and emergency numbers.
- Set check-in times and escalation rules.
- Save the plan offline and carry a paper copy.
- Update your contact if plans change.
Weather and Rules
- Check Weather.gov or the relevant NWS forecast.
- Review overnight low, wind, storms, heat, smoke, snow, and flood risk.
- Check campground, park, forest, or land-manager alerts.
- Verify permits, fees, gate times, food-storage rules, and quiet hours.
- Confirm fire restrictions before planning a fire.
Campsite Choice
- Avoid low streamside ground when flooding is possible.
- Look for level, durable, legal ground.
- Check overhead branches, drainage, road access, and nearby hazards.
- Identify bathroom, water, host/ranger contact, and exit route.
- Keep food, trash, and scented items contained according to local rules.
Safety Basics
- Navigation backup.
- Headlamp or flashlight.
- First aid kit and personal medications.
- Water for drinking, cooking, and cleaning.
- Water treatment plan if potable water is not available.
- Weather-appropriate clothing and insulation.
- Shelter plus a simple emergency shelter option.
- Food plan that keeps perishables cold if you bring them.
Arrival and Night Routine
- Confirm the site before unpacking.
- Set up shelter before relaxing.
- Put water, light, first aid, warm layer, and rain layer where you can reach them.
- Cook, clean, and store food before it gets late.
- Send arrival check-in if service is available.
- Keep keys, phone, and headlamp in the same place overnight.
Exit Rules
- Leave or change plans if weather, access, legality, food storage, health, or comfort crosses your pre-set threshold.
- Do not wait for a problem to become dramatic.
- Tell your contact when your plan changes.
Bottom Line
Solo camping for beginners works best when the trip is simple enough that you can focus on decisions instead of crisis management. Start with a modest site, verify the rules and weather, leave a useful itinerary, pack safety basics you can actually find, and give yourself permission to leave if the plan stops making sense.
The confidence comes from repeatable preparation, not from pretending risk does not exist.